
Integrating the Bitly API into your apps or workflows unlocks powerful features like link shortening, click analytics, and campaign automation. But before you can start making API calls, you need a Bitly OAuth access token — a secure key that authenticates your requests.
Here’s a simple, step-by-step guide (with images) to help you generate your Bitly OAuth access token quickly and securely.
Step 1: Log In to Your Bitly Account
Visit bitly.com and log in with your credentials.
Logging into your Bitly dashboard is the first step to access developer settings and API options.
Step 2: Open Account Settings
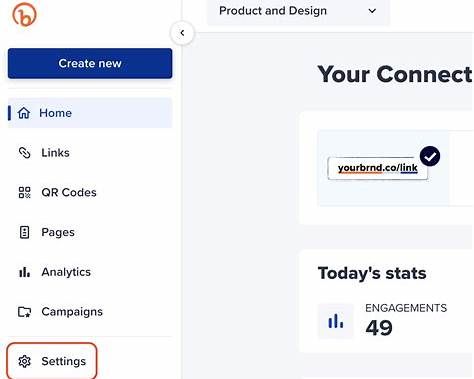
Once logged in, click Settings in the left sidebar.
This opens your account preferences.
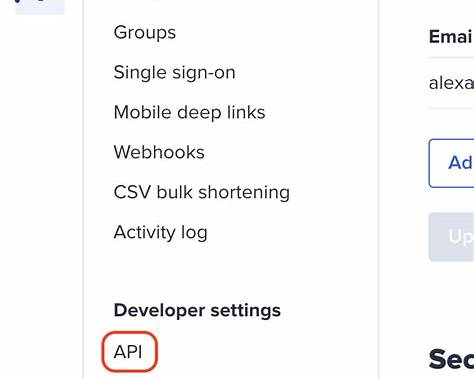
Under Developer settings, select API.
This takes you to the Bitly API configuration page.
Step 3: Generate Your Bitly OAuth Access Token
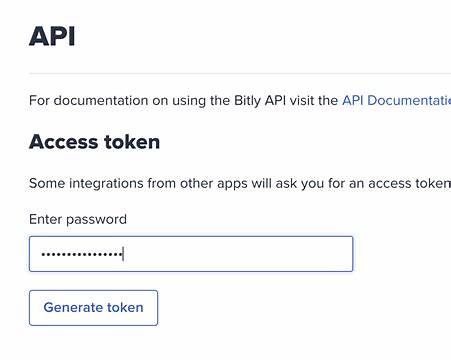
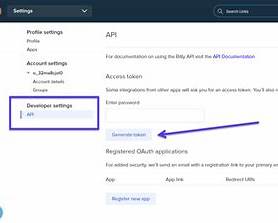
On the API page, you’ll see the Access Token section:
- Enter your Bitly account password (for security).
- Click Generate Token.
- Bitly will create your unique OAuth access token.
Step 4: Copy & Store the Access Token
After generating the token:
Copy the token and paste it into your code or API configuration.
Store it safely — treat it like a password. If someone else gets access, they can use your Bitly API permissions.
If you navigate away and come back later, Bitly may ask you to re-enter your password to display it again.
Using Your Bitly Token in API Requests
Once you have your token, you use it to authorize API calls. For example, include it in the header of your HTTP request like this:
Authorization: Bearer YOUR_ACCESS_TOKEN